
Desserts
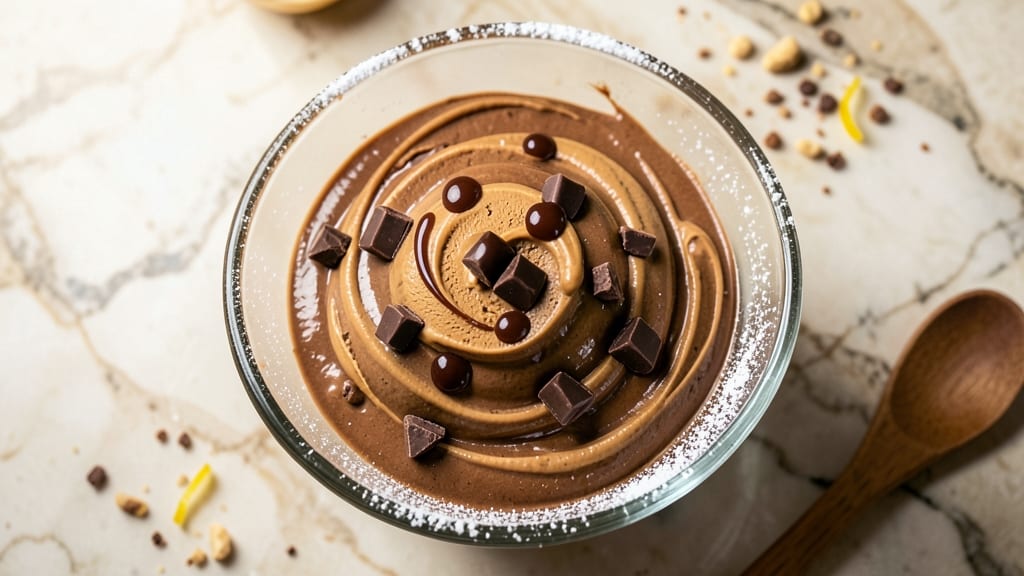
This Ben and Jerry's chocolate peanut butter ice cream recipe delivers the same creamy, fudgy texture you love—but made fresh at home. The secret lies in blending rich chocolate chunks with smooth peanut butter swirls, creating that signature flavor explosion in every bite.
I've perfected this version after testing countless batches, ensuring the perfect balance of sweetness and richness without artificial ingredients.
The process is simpler than you'd think: combine heavy cream, condensed milk, and vanilla for the base, then fold in melted chocolate and peanut butter for that iconic swirl effect.
Using an ice cream maker guarantees a smooth, creamy texture, but I'll also share a no-churn method for those without one. The key is patience—freezing properly ensures that creamy, scoopable consistency you crave.
What you'll end up with is homemade ice cream that rivals the original—velvety smooth with pockets of melted chocolate and peanut butter that melt on your tongue.
The aroma alone will have everyone gathering around the freezer, and the first taste will make them question how they ever settled for store-bought. This recipe makes about a quart, perfect for sharing or keeping for yourself.
Serve it straight from the freezer with a sprinkle of crushed peanuts or chocolate shavings for extra flair. For a fun twist, try swirling in caramel or adding crushed cookies to the mix.
The possibilities are endless, but the base recipe is foolproof—just follow the steps, and you'll have restaurant-quality ice cream in your freezer in no time.
Ingredients for ben and jerry's chocolate peanut butter ice cream
These nine ingredients create that signature creamy, fudgy Ben & Jerry's flavor at home.
| Ingredient | Amount | Notes |
|---|---|---|
| Heavy Whipping Cream 🥛 | 2 cups | Full-fat for best texture |
| Sweetened Condensed Milk 🥛 | 1 can | 14 oz can (standard size) |
| Vanilla Extract 🌿 | 1 tbsp | Pure vanilla preferred |
| Semisweet Chocolate Chunks 🍫 | 1 cup | High-quality chocolate preferred |
| Creamy Peanut Butter 🥜 | ½ cup | Natural, no added sugar |
| Granulated Sugar 🍚 | ¼ cup | Fine grain preferred |
| Salt 🧂 | ¼ tsp | Fine sea salt preferred |
| Crushed Peanuts 🥜 | ¼ cup | For garnish (optional) |
| Chocolate Shavings 🍫 | ¼ cup | For garnish (optional) |
The chocolate chunks and peanut butter are non-negotiable for that iconic flavor. Ghirardelli or Nestlé semi-sweet chocolate chunks melt perfectly and give the best texture—avoid the cheap stuff, trust me. For peanut butter, natural brands like Smucker's or Skippy work great, but skip the added sugar versions if you want to control sweetness. The condensed milk can is a must—don't substitute with powdered. Store-brand is fine, but if you're going to splurge, the Eagle Brand cans have a richer taste. Heavy cream is where texture happens—full-fat only—anything else and you'll end up with ice cream that's more icy than creamy.
No chocolate chunks? Chop up a chocolate bar—just make sure it's semi-sweet, not milk chocolate. Running low on peanut butter? Substitute with tahini for a different but still delicious flavor profile. The vanilla extract can be imitation, but pure vanilla has better depth. Want to skip the sugar? Use a sugar-free condensed milk instead, but the texture might be slightly icier. The crushed peanuts and chocolate shavings are purely for garnish, but they make it feel like the real deal when serving—Trader Joe's has great pre-crushed options if you don't want to chop your own.
This ice cream freezes best in a quart-sized container—leave 1-inch headspace for expansion. Once frozen solid, it'll keep for up to 2 months. For the no-churn method, let it sit in the freezer for at least 6 hours, but overnight is ideal. If you're using an ice cream maker, churn for 20-25 minutes until thick. The longer it sits in the freezer, the creamier it gets—resist the urge to eat it too soon.
Why You'll Love This Recipe
- No-Fuss Mixing: I swear by this recipe because it’s just stir, chill, repeat—no machine, no fuss. The heavy cream and condensed milk blend into a dreamy base in minutes, and the peanut butter and chocolate chunks fold in like a warm hug. Honestly, I’ve made it while scrolling through my phone. That’s how effortless it is.
- Crave-Worthy Combo: The first bite hits like a Ben & Jerry’s truck rolled into your mouth—rich, nutty, and just sweet enough. The chocolate chunks melt into the creamy peanut butter swirls, creating these little pockets of next-level satisfaction. (Yes, even on a Tuesday night.)
- Party in a Bowl: This isn’t just dessert—it’s the star of game nights, potlucks, or when you need to impress someone with zero effort. Freeze it in individual cups for grab-and-go treats, or scoop it straight into a bowl for a no-fuss indulgence. My daughter picks out the chocolate chunks first, but still asks for seconds.
- Budget-Friendly Luxury: You’re basically making gourmet ice cream for pennies. Heavy cream and condensed milk stretch your dollars, and peanut butter keeps it affordable without sacrificing that decadent taste. Plus, leftovers? They last forever in the freezer—because let’s be real, you’ll eat it all before then.
Step-by-step instructions for Ben and Jerry's chocolate peanut butter ice cream
Here's how to recreate that iconic creamy texture and rich flavor at home.
Whip the Cream and Prepare the Base
In a large mixing bowl, combine the 2 cups heavy whipping cream and 0.25 cup granulated sugar. Using an electric mixer, whip the mixture on medium-high speed for 3-4 minutes until it forms stiff peaks—it should hold its shape when the beaters are lifted. This step is crucial for that signature creamy texture.
In a separate bowl, mix together the 1 can sweetened condensed milk, 1 tbsp vanilla extract, and 0.25 tsp salt. Stir until fully combined and smooth. The condensed milk adds natural sweetness and thickness, while the vanilla extract enhances the flavor profile. Set this mixture aside while you prepare the chocolate swirl.
Melt the Chocolate and Peanut Butter
In a microwave-safe bowl, melt the 1 cup semisweet chocolate chunks in 30-second intervals, stirring between each interval until fully melted and smooth. The chocolate should reach a temperature where it coats the back of a spoon without any graininess. If you prefer a stovetop method, melt the chocolate in a double boiler over low heat, stirring constantly until completely smooth.
While the chocolate melts, warm the 0.5 cup creamy peanut butter in the same microwave-safe bowl or over low heat until it becomes completely liquid and runny. This ensures it blends seamlessly with the chocolate. Once both are melted, combine them in a small bowl and stir until fully mixed. The peanut butter adds a rich, nutty depth that complements the chocolate perfectly.
Combine All Ingredients
Gently fold the melted chocolate and peanut butter mixture into the whipped cream until fully incorporated. Be careful not to overmix—just enough to combine everything smoothly. Then, add the sweetened condensed milk mixture and fold it in as well. The mixture should look like a thick, swirled batter with a marbled appearance.
Here's the thing—this is where the magic happens. The combination of whipped cream, condensed milk, and melted chocolate creates a base that’s both creamy and rich. If the mixture seems too thick, you can add a splash of milk to loosen it slightly, but it should still hold its shape when spooned.
Freeze and Swirl
Transfer the mixture to a loaf pan or 9x5-inch baking dish and smooth the top with a spatula. Cover the pan tightly with plastic wrap, pressing the wrap directly onto the surface of the ice cream to prevent ice crystals from forming. Place the pan in the freezer and freeze for 4 hours, or until completely firm.
Once the ice cream is fully frozen, remove it from the freezer and let it sit at room temperature for 5-10 minutes to soften slightly. This makes it easier to create those signature swirls. Using a knife or an ice cream scoop, gently swirl the 0.25 cup crushed peanuts and 0.25 cup chocolate shavings into the top layer. The peanuts add a delightful crunch, while the chocolate shavings enhance the visual appeal and flavor.
Serve and Enjoy
Return the ice cream to the freezer for an additional 1-2 hours to firm up before serving. Scoop into bowls and garnish with extra crushed peanuts and chocolate shavings if desired. The texture should be creamy yet firm, with a perfect balance of peanut butter richness and chocolate intensity.
This recipe delivers on that creamy promise—every bite is smooth, indulgent, and packed with the flavors you love from Ben and Jerry’s. Serve immediately for the best experience, or store in an airtight container in the freezer for up to 2 weeks. Enjoy your homemade treat!
Pro Tips For Making Ben And Jerry'S Chocolate Peanut Butter Ice Cream
- WHISK THE PEANUT BUTTER: Mix the creamy peanut butter into the warm condensed milk mixture first—before adding the chocolate chunks. I learned this the hard way: dumping peanut butter into cold cream makes it clump like a science experiment gone wrong. Stir until it’s fully dissolved and smooth, or you’ll end up with lumpy ice cream that tastes like you forgot to blend.
- CHOP CHOCOLATE UNIFORMLY: Use a knife to cut the semisweet chocolate chunks into small, even pieces before adding them to the base. Too big? They’ll melt unevenly and create icy pockets in your ice cream. Aim for quarter-inch cubes—this ensures every bite has that perfect chocolate-peanut-butter swirl without texture surprises.
- WAIT FOR CREAM TO COOL: Let the hot condensed milk mixture cool to lukewarm before folding in the whipped cream. I used to rush this, and the cream would deflate faster than a balloon at a party. Test with your finger: if it’s too hot to touch for 5 seconds, it’s still too hot. Patience here means creamier ice cream that doesn’t turn into soft-serve soup.
- SWAP PEANUT BUTTER BRANDS: Not all peanut butters play nice in ice cream. Skip the chunky or natural varieties—they separate or add grit. Go for smooth, commercial-style brands like Jif or Skippy (yes, the ones with the red caps). They blend seamlessly and won’t turn your dessert into a texture experiment. Trust me, your taste buds will notice.
Perfect pairings for this recipe
Classic Toppings
Start with the crushed peanuts and chocolate shavings from the recipe—they're the signature Ben & Jerry's finish. For extra crunch, toast the peanuts in a dry skillet over medium heat for 3-4 minutes until golden, then crush them with a rolling pin or mortar and pestle.
I like to use Ghirardelli chocolate bars for shavings—they melt beautifully and add that rich, velvety texture. 🥜
Warm Complements
Serve your ice cream with warm peanut butter cookies or chocolate chip cookies on the side. The heat from the cookies contrasts perfectly with the cold ice cream, enhancing both flavors.
I always make a batch of Nutella-stuffed chocolate cookies—just pipe Nutella into cookie dough before baking. For a lighter option, try banana slices or caramel sauce drizzled over the top.
Coffee & Tea Pairings
A strong cup of espresso or dark roast coffee cuts through the richness of the peanut butter and chocolate. I recommend a double shot of Starbucks Dark Roast or a cold brew concentrate for a refreshing twist.
For tea lovers, a chamomile or peppermint tea provides a soothing contrast to the indulgent flavors. The caffeine helps balance the sweetness, making each bite even more satisfying. ☕
Boozy Upgrades
Add 1-2 tablespoons of peanut butter-flavored liqueur (like Godiva Peanut Butter Liqueur) to the base mixture before freezing for a boozy twist. For a stronger kick, swirl in 1-2 tablespoons of Kahlúa or Baileys after churning.
If you prefer beer pairings, a stout like Guinness or a dark ale complements the chocolate and peanut flavors beautifully. Just be mindful of the alcohol content—it can affect freezing time.
Unexpected Twists
For a fun twist, mix in ½ cup of crushed pretzels or toasted coconut flakes for a salty-sweet contrast. I also love adding dried cherries or raspberries to balance the richness.
Another idea? Swirl in ½ cup of caramel sauce before freezing for a gooey, layered effect. These additions elevate the classic recipe while keeping it approachable and exciting. 💫
Nutrition facts
Frequently asked questions
Can I make this without an ice cream maker?
For a no-churn version, simply combine all ingredients in a large bowl, cover tightly with plastic wrap (pressed directly on the surface), and freeze for 6-8 hours. Stir vigorously every 2 hours to prevent ice crystals. The texture will be slightly softer but still delicious.
What's the best way to store homemade ice cream?
Store in an airtight container with minimal air space to prevent freezer burn. It keeps best for 2 weeks at -10°F or colder. For longer storage, portion into small containers and freeze individual servings. Let it sit at room temperature for 5-10 minutes before serving to soften slightly.
Why did my ice cream turn icy?
Ice crystals form when air gets trapped during freezing or if the mixture wasn't stirred properly. Always press plastic wrap directly on the surface before freezing, and avoid opening the container until fully set. For a quick fix, microwave the ice cream for 10-15 seconds to soften, then stir vigorously before refreezing.
Can I substitute peanut butter with something else?
Yes! Try almond butter or tahini for a different nutty flavor, or sunflower seed butter for a nut-free option. For a chocolate-only version, add 2 tbsp cocoa powder to the base mixture. The texture will vary slightly, but the richness remains.
How do I make it extra creamy?
Use ultra-pasteurized heavy cream instead of regular cream, and whip it to stiff peaks before mixing. For even better results, chill all ingredients (especially dairy) for 1 hour before starting. Adding 1 tbsp corn syrup to the base also prevents ice crystals. The key is patience—let it freeze slowly for optimal texture.