
Desserts
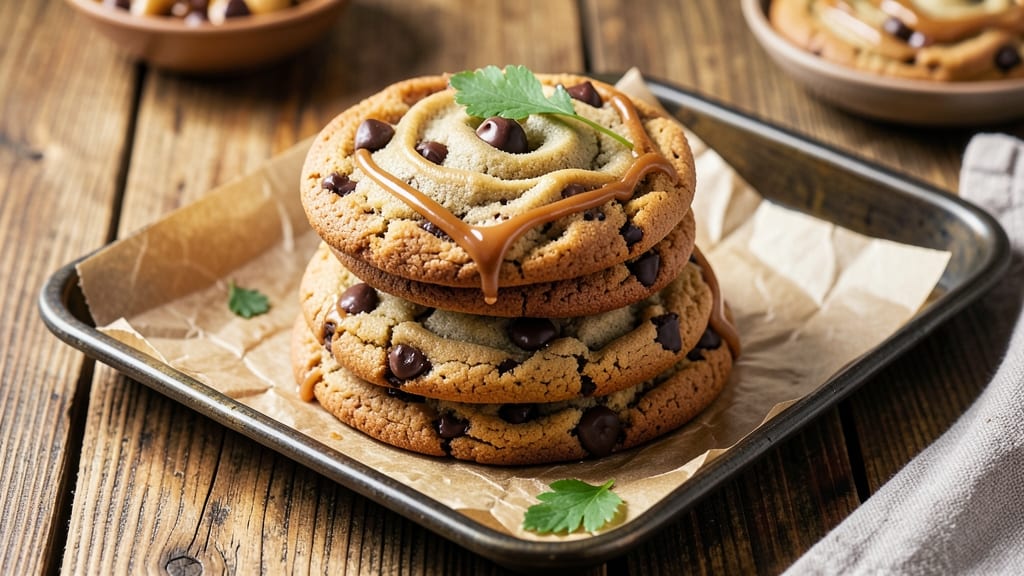
This brown butter peanut butter chocolate chip cookie recipe delivers a sophisticated twist on a classic favorite—where nutty, caramelized butter meets rich peanut butter and melty chocolate in every bite.
The secret to their irresistible flavor lies in browning the butter first, which adds a deep, toasty aroma and complex sweetness that transforms ordinary cookies into something extraordinary. These aren’t your average chocolate chip cookies; they’re a symphony of textures and flavors that will have everyone asking for the recipe.
What makes these cookies truly special is the perfect balance of ingredients: the smoky depth of brown butter, the creamy richness of peanut butter, and the gooey pockets of chocolate that melt just as you pull them from the oven.
The dough comes together with just a handful of simple ingredients—no fancy techniques required—yet the results are anything but basic. Each batch yields about 24 cookies, making them ideal for sharing or satisfying a serious sweet tooth.
The baking process is straightforward: spread the dough into thick rounds, bake at 350°F for 10-12 minutes, and let them cool just enough to handle before diving in.
The edges will be crisp and golden, while the centers remain soft and chewy, with every bite packed with layers of peanut butter flavor and caramelized butter notes. These cookies are perfect for holiday gatherings, potlucks, or simply treating yourself to something truly indulgent.
For an extra touch of sophistication, consider adding a sprinkle of flaky sea salt or a handful of chopped peanuts before baking. The contrast of salty and sweet will elevate these cookies to another level.
Once you try them, you’ll never go back to the original version again—this is the ultimate upgrade to a timeless treat.
Ingredients for brown butter peanut butter chocolate chip cookie
The magic starts with brown butter and peanut butter—where nutty, smoky depth meets rich chocolate in every bite.
| Ingredient | Amount | Notes |
|---|---|---|
| Unsalted Butter 🧈 | 1 ½ cups | Browned to nutty depth |
| Natural Peanut Butter 🥜 | 1 cup | Creamy, no added sugar |
| Granulated Sugar 🍚 | 1 cup | Light brown sugar works too |
| Packed Brown Sugar 🍚 | ½ cup | For extra moisture |
| Large Eggs 🥚 | 2 whole | Room temperature preferred |
| Pure Vanilla Extract 🌿 | 2 tsp | High-quality preferred |
| All-Purpose Flour 🌾 | 2 ½ cups | Spooning into cups |
| Baking Soda 🧂 | 1 tsp | Ensures proper rise |
| Diamond Crystal Kosher Salt 🧂 | ½ tsp | Adjusts to taste |
| Semisweet Chocolate Chips 🍫 | 2 cups | High-quality preferred |
| Chopped Peanuts 🥜 | ½ cup | Optional for crunch |
| Flaky Sea Salt 🧂 | 1 tsp | For finishing touch |
The butter is non-negotiable here. Brown it until it smells like caramel and nuts—that's the secret to the complex flavor. I use Land O'Lakes unsalted butter because it's reliable, but any good-quality unsalted works. For the peanut butter, natural, no-stir brands like Smucker's give you that extra peanut flavor without additives. The chocolate chips? Ghirardelli or Guittard are worth the splurge—they melt beautifully and taste richer. If you're feeling fancy, toss in a few white chocolate chips too for contrast. The peanuts? Store-bought chopped works fine, but if you're feeling ambitious, toast them first for extra crunch.
No brown butter? Use regular butter plus 1 tbsp of caramelized sugar—it's a decent stand-in, though not as deep. Out of peanut butter? Almond butter or cashew butter works in a pinch, but the flavor will shift slightly. The baking soda is crucial—don't skip it or swap for baking powder. For the chocolate chips, chop your own chocolate bars if you're feeling fancy, but the bags are fine for everyday baking. If you're avoiding nuts entirely, skip the peanuts and add an extra 0.25 cup of chocolate chips instead. The sea salt? Maldon flakes are ideal, but any flaky salt will do.
This dough keeps for 3 days in the fridge, wrapped tightly in plastic. For longer storage, freeze the dough balls for up to 3 months—bake straight from frozen, adding 1-2 minutes to the cook time. Once baked, cookies stay fresh for 5 days at room temperature if stored in an airtight container. Pro tip: Underbake slightly—they'll firm up as they cool, giving you that perfect chewy center. And if you're making these ahead for a party, reheat at 300°F for 5 minutes to restore their gooey magic.
Why You'll Love This Recipe
- No Fuss Mixing: I swear by this dough—just cream butter and sugars, then fold in peanut butter and chocolate. No food processor, no stress, and honestly? It’s the kind of recipe where I can chat with my kid while measuring ingredients.
- Nutty Crunch Magic: Brown butter takes these cookies from good to dangerously addictive—that toasty, caramelized depth pairs perfectly with peanut butter’s richness. The chocolate chips? Just the cherry on top.
- Weeknight Hero: These bake in 12 minutes and stay soft for days, so I make a whole batch on Sunday. Pack them in lunchboxes, toss some in my coffee mug, or just snack straight from the jar—no judgment here.
- Budget-Friendly Luxury: Peanut butter and butter stretch far, and brown sugar adds depth without extra cost. I’ve made 24 cookies for under $3, and they disappear faster than my willpower around them. (Yes, even on a Tuesday night.)
Step-by-step instructions for brown butter peanut butter chocolate chip cookies
Here's how to create cookies with layers of nutty, smoky depth and gooey chocolate chunks—every bite is a revelation.
Brown the Butter to Nutty Perfection
Melt the 1.5 cups unsalted butter in a heavy-bottomed saucepan over medium heat. Watch closely as it foams and bubbles—this is your signal. Once the foam subsides, the butter will begin to turn golden, then develop a nutty aroma. Let it cook until it reaches a deep golden brown color with visible brown flecks and that irresistible toasty smell. This takes about 5-7 minutes total.
Real talk: don't walk away. Brown butter burns quickly once it reaches the nutty stage. Immediately remove from heat and let it cool for 2 minutes—this stops the cooking process. The butter should be liquid but still retain that rich, caramelized aroma. If you skip this step, you're missing the soul of these cookies.
Cream Butter, Peanut Butter, and Sugars
Transfer the browned butter to a stand mixer fitted with the paddle attachment. Add the 1 cup natural peanut butter, 1 cup granulated sugar, and 0.5 cup packed brown sugar. Beat on medium speed for 3-4 minutes until light and fluffy. You're looking for a color change from pale to a rich, golden hue and nearly double in volume. This creaming process incorporates air, which creates those beautiful crackly tops and helps the cookies spread just right.
Here's the thing—don't rush this step. Under-creaming leads to dense cookies. Scrape down the sides of the bowl with a spatula every minute to ensure even mixing. The mixture should be smooth with no visible peanut butter streaks. If it looks too thick, that's perfect—we'll incorporate the eggs next.
Add Eggs, Vanilla, and Dry Ingredients
Add the 2 whole large eggs one at a time, mixing on low speed for 30 seconds after each addition until fully incorporated. Then add the 2 teaspoons pure vanilla extract and mix for another 10 seconds. The mixture might look slightly curdled, but that's normal and will resolve when we add the dry ingredients.
In a separate bowl, whisk together the 2.5 cups all-purpose flour, 1 teaspoon baking soda, and 0.5 teaspoon diamond crystal kosher salt. With the mixer on low speed, gradually add the dry ingredients to the wet mixture until just combined—you should still see a few flour streaks. Over-mixing develops gluten and makes cookies tough. Remove the bowl from the mixer and fold in the 2 cups semisweet chocolate chips and 0.5 cup chopped peanuts using a silicone spatula until evenly distributed.
Chill the Dough for Better Texture
Cover the bowl with plastic wrap and refrigerate for at least 1 hour (I prefer 2 hours or even overnight). Chilling solidifies the butter, which prevents the cookies from spreading too thin in the oven. It also allows the flour to fully hydrate, creating better texture. Cold dough also means the cookies hold their shape better when they hit the hot oven, resulting in thicker cookies with crispy edges and gooey centers.
This step makes a MASSIVE difference in the final result. If you're short on time, at least 30 minutes in the fridge will help. Don't skip it—trust me, the texture difference is worth the wait. While the dough chills, preheat your oven to 350°F and line two baking sheets with parchment paper.
Bake to Golden Perfection
Scoop the chilled dough into 2-tablespoon portions (I use a cookie scoop for uniform size) and place them 3 inches apart on the prepared baking sheets. Bake for 11-13 minutes until the edges are golden brown but the centers still look slightly underdone. They'll continue cooking on the hot pan after you remove them from the oven.
Immediately after removing from the oven, sprinkle each cookie with a pinch of flaky sea salt for that perfect sweet-salty contrast. Let them cool on the baking sheet for 5 minutes before transferring to a wire rack. Enjoy them warm for the ultimate experience—each bite delivers rich, nutty, smoky depth with gooey chocolate chunks and a touch of salty crunch.
Pro Tips For Making Brown Butter Peanut Butter Chocolate Chip Cookie
- STOP WHEN IT’S GOLDEN: Brown butter until it smells like a campfire—nutty, toasty, and just starting to smoke. If you walk away for even 30 seconds, you’ll end up with bitter, overcooked butter that’ll taste like burnt peanut oil. Keep your eye on it and pull it the second it hits that perfect amber stage.
- CHILL THE DOUGH LONGER: I used to think 30 minutes in the fridge was enough, but these cookies need at least 2 hours—or overnight if you’re planning ahead. The peanut butter and brown butter need time to mellow out; otherwise, your cookies will spread like pancakes and taste overly rich. Trust me, the wait makes them chewier and more flavorful.
- USE ROOM-TEMP PEANUT BUTTER: Scooping straight from the fridge? Big mistake. Cold peanut butter won’t blend smoothly, and your dough will turn out lumpy and uneven. Let that jar sit out for 10-15 minutes first—just until it’s soft enough to stir easily. (Pro move: Microwave it for 10 seconds if you’re in a rush, but don’t overdo it or it’ll separate.)
- WEIGH YOUR BROWN SUGAR: Packed brown sugar isn’t a joke—if you scoop it loosely, your cookies will be dry and crumbly. Use a kitchen scale for accuracy, or at least press it firmly into the measuring cup. A little extra moisture from the molasses in the sugar keeps these cookies tender, especially with the peanut butter and brown butter in the mix.
Make-ahead tips for brown butter peanut butter chocolate chip cookie
Dough Prep Ahead
Make your life easier by preparing the dough a full 24 hours ahead. After mixing all ingredients, cover the dough tightly with plastic wrap and refrigerate. The flavors meld beautifully overnight, and the chilled dough is perfect for baking straight from the fridge.
I like to portion the dough into 2-tablespoon balls and store them in a single layer on a tray before transferring to an airtight container—this prevents sticking. 💫
Freezing Dough Balls
For maximum convenience, freeze the dough balls for up to 3 months. After chilling the dough, roll each portion into a ball and place them on a parchment-lined tray. Freeze until solid, then transfer to a ziplock freezer bag or airtight container.
When ready to bake, simply add 1-2 extra minutes to the baking time—no thawing required! I love this method for holiday baking when I need to pull cookies out of the freezer at the last minute.
Baked Cookie Storage
Store freshly baked cookies in an airtight container at room temperature for up to 5 days. The brown butter flavor actually intensifies over time, making them taste even better the next day.
For longer storage, freeze baked cookies in a single layer on a tray, then transfer to a container. Reheat at 300°F for 5 minutes to restore their soft, gooey centers—this is my secret for serving cookies at their peak texture. ❄️
Portioning for Parties
When making cookies for gatherings, divide the dough into 4 equal portions and freeze 3 of them. This way, you can bake just one portion at a time, keeping the rest fresh.
I like to label each portion with the date and baking instructions so guests can enjoy freshly baked cookies throughout the event. For extra presentation, arrange cookies on a platter with a sprinkle of crushed peanuts and a dusting of powdered sugar.
Reviving Stale Cookies
Even the best cookies can lose their chewiness after a few days. To revive them, place cookies on a baking sheet and bake at 325°F for 3-4 minutes until warmed through. The heat reactivates the butter, bringing back that perfect texture.
For a quick fix, microwave individual cookies for 10-15 seconds—just be careful not to overdo it or they'll turn rubbery. This trick works wonders for cookies that have been sitting in your pantry for a week. 🔥
Make-Ahead Baking Schedule
Plan your baking schedule like a pro: Prepare the dough the night before, portion it in the morning, and freeze any extras. Bake half the batch in the afternoon and save the rest for later.
I find this works perfectly for family gatherings or when I need to feed a crowd without last-minute stress. The key is keeping the dough cold until baking—this ensures consistent results every time. With this approach, you'll have perfect cookies ready whenever you need them! ⏰
Nutrition facts
Frequently asked questions
Why does brown butter make these cookies taste so much better?
The browning process creates hundreds of new flavor compounds that give the butter a deep, nutty, caramel-like taste. This rich, toasty aroma transforms ordinary cookies into something extraordinary. The brown butter also adds moisture and helps create that perfect balance of crispy edges and chewy centers.
Can I use regular butter instead of brown butter?
You can substitute, but you'll miss the special flavor. For similar results, add 1 tablespoon of caramelized sugar to regular butter or use 1 tablespoon of brown sugar extra. The texture will be slightly different, but still delicious. The key is achieving that nutty depth that makes these cookies unique.
How do I prevent my cookies from spreading too much?
Chilling the dough for at least 1 hour (preferably 2 hours) is crucial. Cold butter spreads less in the oven. Also, use 2-tablespoon portions of dough and place them 3 inches apart on the baking sheet. For extra insurance, bake at 350°F for the full 11-13 minutes—they'll firm up as they cool.
What's the best way to store these cookies?
Keep them in an airtight container at room temperature for up to 5 days. For longer storage, freeze baked cookies for up to 3 months. To revive stale cookies, warm them at 325°F for 3-4 minutes or microwave for 10-15 seconds. The flavors actually improve after the first day!
Can I make these cookies without peanuts?
Simply omit the chopped peanuts and add an extra 0.25 cup of chocolate chips instead. For extra crunch, try adding 0.5 cup of oats or crushed pretzels. The peanut butter flavor will still shine through beautifully. These cookies are already nutty enough without extra peanut pieces!