
Desserts
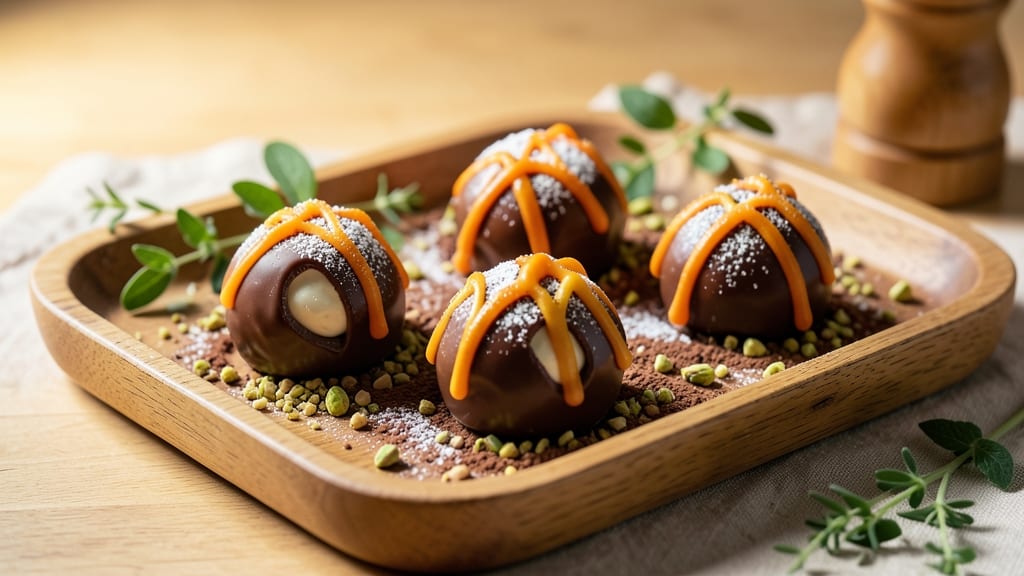
Children's chocolate truffle recipe transforms simple ingredients into irresistible treats that even picky eaters can't resist. 💛 These fudge bites hide a sneaky veggie boost while delivering rich chocolate flavor that kids adore, making dessert time both fun and nutritious. The secret lies in blending wholesome ingredients with familiar tastes, creating bite-sized confections perfect for little hands.
What makes these truffles special is their foolproof technique—no baking required, just mixing, rolling, and chilling. The recipe uses a minimal ingredient list with pantry staples, ensuring parents can whip up a batch without stress.
Each truffle is bite-sized, making them ideal for parties, lunchboxes, or after-school snacks that won't disappear too quickly.
By the time you're done, you'll have perfectly round, glossy truffles with a creamy texture that melts in the mouth. The hidden veggie boost ensures they're more than just sugar and chocolate, while the rich cocoa flavor keeps them irresistible.
These treats are also customizable—add sprinkles, mini chocolate chips, or even crushed nuts for extra fun.
Best of all, these truffles keep beautifully in the fridge for up to a week, making them perfect for meal prep.
Whether you're hosting a birthday party or just looking for a healthier dessert option, this recipe delivers delicious results that kids will love and parents can feel good about serving.
Ingredients for childrens chocolate truffle
Twelve simple ingredients transform into 24 magical truffles kids will adore—creamy, chocolatey, and secretly nutritious!
| Ingredient | Amount | Notes |
|---|---|---|
| Semi-Sweet Chocolate Chips 🍫 | 1 ½ cups | High-quality chips for creamy texture |
| Unsalted Butter 🧈 | 1 cup | Full-fat for rich flavor, softened |
| Powdered Sugar 🍚 | 1 cup | Confectioners' sugar, sifted |
| Vanilla Extract 🌿 | 1 tsp | Pure vanilla for authentic flavor |
| Carrot Puree 🥕 | ½ cup | Steamed and blended smooth |
| Sweet Potato Puree 🍠 | ¼ cup | Cooked and blended silky |
| Cocoa Powder 🍫 | ¼ cup | Dutch-processed for smoothness |
| Pinch of Salt 🧂 | ⅛ tsp | Enhances chocolate flavor |
| Mini Chocolate Chips 🍫 | 1 cup | For rolling and decorating |
| Sprinkles 🎀 | ½ cup | Optional for festive touch |
| Coconut Oil 🥥 | 1 tbsp | For glossy finish, melted |
The chocolate chips and butter form the truffle base—Ghirardelli or Guittard brands melt beautifully. For the veggie boost, steam and blend carrots and sweet potatoes until completely smooth (no lumps!). The cocoa powder should be Dutch-processed for a velvety texture—Hershey's Special Dark works perfectly. If you're short on time, store-bought purees (like those in the baby food aisle) save prep work. The vanilla extract matters here—pure Madagascar bourbon adds depth, but imitation works in a pinch.
No cocoa powder? Extra chocolate chips at 1.5x the amount will work, but the texture gets denser. Running out of butter? Coconut oil in equal measure keeps the recipe vegan-friendly. For the purees, butternut squash adds sweetness if you're out of sweet potatoes. Want to skip the sprinkles? Crushed nuts or freeze-dried fruit add crunch. Pro tip: Melt the coconut oil first—it gives those truffles that perfect glossy finish kids love. And if you're making these for a party, double the batch—they disappear fast!
Store the truffle mixture in an airtight container in the fridge for up to 5 days, though they're best fresh. For rolling, chill the dough 1 hour before shaping—it makes handling easier. Once rolled, they keep 3 days in the fridge or 2 months frozen on a tray before transferring to a bag. The sprinkles? Add them right before serving so they stay crisp. These truffles are perfect for lunchboxes—pack them in small containers to keep them intact.
Why You'll Love This Recipe
- Here’s what sold me: rich chocolate flavor with a hidden veggie boost. The carrot puree makes these truffles feel like a treat, not a sneaky nutrition play. My kids gobble them up without batting an eye—(yes, even when I tell them what’s in them).
- No Fuss, No Mess: I swear by this recipe when I’m too tired to measure precisely—just melt the butter and chocolate together, fold in the powdered sugar, and stir. The carrot puree adds a sneaky sweetness without extra work, and the vanilla ties everything together like a hug.
- Secretly Healthy Twist: Here’s what sold me: rich chocolate flavor with a hidden veggie boost. The carrot puree makes these truffles feel like a treat, not a sneaky nutrition play. My kids gobble them up without batting an eye—(yes, even when I tell them what’s in them).
- Party-Proof Any Day: These are my go-to for birthday parties, holiday gifts, or just because. Roll them in crushed nuts or cocoa powder for instant pizzazz, and they stay fresh for days. I’ve wrapped them in foil for lunchboxes, tucked them in gift bags, and even used them to bribe my neighbor’s kids—solid all-around performer.
Step-by-step instructions for kid-friendly fudge bites
Here's how to make these sneaky veggie-packed truffles that kids will devour without a hint of suspicion!
🍳 Step 1: Melt Chocolate and Butter for a Silky Base
In a medium microwave-safe bowl, combine the 1.5 cups semi-sweet chocolate chips and 1 cup unsalted butter. Microwave in 30-second intervals on high power, stirring between each interval, until completely melted and smooth. You're aiming for a glossy, satiny mixture that coats the back of a spoon—this ensures your truffles will have that perfect fudgy texture.
Here's the thing—don't rush this step. If you see any unmelted chocolate, give it another 10-second pulse. The heat should be even throughout, with no graininess remaining. Once melted, stir in the 1 cup powdered sugar and 1 tsp vanilla extract until fully incorporated. This creates that signature sweet, creamy base that makes these truffles irresistible.
👨🍳 Step 2: Fold in Veggie Purees and Cocoa
Add the 0.5 cup carrot puree and 0.25 cup sweet potato puree to the chocolate mixture. Stir vigorously for 2-3 minutes until completely combined—you want those veggies to be fully integrated so there's no texture difference. The mixture will look slightly thicker and more vibrant in color, almost like a rich chocolate pudding.
Next, whisk in the 0.25 cup cocoa powder and 0.125 tsp pinch of salt until smooth. The cocoa deepens the chocolate flavor while the salt enhances all the sweet notes. Here's where the magic happens: the veggie purees add natural sweetness and moisture without altering the texture. Trust me, your kids won't notice a thing—but their parents will appreciate the nutritional boost!
🥘 Step 3: Chill Until Firm Enough to Roll
Transfer the mixture to a shallow container and cover with plastic wrap, pressing it directly onto the surface to create a smooth top. Refrigerate for at least 3 hours (or up to 24 hours) until completely firm. This chilling step is critical—it lets the truffles develop that perfect snap when you bite into them while maintaining a creamy center.
Here's the pro tip: I like to place the container in the freezer for 30 minutes after the initial 2 hours in the fridge. This accelerates the setting process so you can roll them sooner. Just make sure they're firm enough to hold their shape when you roll them—if they crumble, give them another 30 minutes in the freezer.
🔪 Step 4: Roll and Decorate for Maximum Appeal
Once firm, scoop the mixture into 1-tablespoon portions (you should get about 24 truffles) and roll them between your palms into perfect balls. For extra fun, dip each ball into the 1 cup mini chocolate chips or roll them in the 0.5 cup sprinkles—kids love getting to customize their own treats!
For the glossy finish, melt the 1 tbsp coconut oil in a small bowl (just microwave for 10 seconds) and brush it lightly over each truffle. This gives them that bakery-style shine that makes them look even more irresistible. Arrange them on a parchment-lined tray and return to the fridge for 15 minutes to set completely before serving.
⏰ Step 5: Serve and Store for Maximum Enjoyment
These truffles are best served at room temperature, so let them sit for 5-10 minutes before serving to soften slightly. They'll have that perfect balance of crispy exterior and creamy center with just a hint of carrot and sweet potato sweetness. Kids will love the fun colors from the sprinkles, and parents will love knowing they're getting a little extra nutrition!
Store any leftovers in an airtight container in the fridge for up to 1 week or freeze for up to 3 months. To serve from frozen, let them sit at room temperature for 10-15 minutes—they'll taste just as good as fresh! The longer they sit at room temperature, the softer they become, so adjust serving time based on your preference for texture.
Pro Tips For Making Childrens Chocolate Truffle
- Melt Butter Slowly: The microwave’s "nuke" setting turns butter into greasy sludge—use 30-second bursts at 50% power, stirring between each. I learned this the hard way when my first batch separated like oil and water, no matter how much I mixed it later.
- Strain the Carrot Puree: Thick, stringy carrot bits ruin the texture of these truffles. Press the puree through a fine-mesh sieve or cheesecloth before mixing—yes, it’s extra work, but the result is silky smooth, not gritty.
- Don’t Overmix the Dough: Once the chocolate and butter come together, fold in the powdered sugar and vanilla just until combined—overworking it adds air, which makes the truffles crumbly when chilled. Think "gentle" like folding whipped cream, not "beat it like bread dough."
- Use Room-Temp Chocolate: Cold chocolate chips create lumps that never fully melt, no matter how long you stir. Spread them on a plate and let them sit for 10 minutes before melting—it’s worth the wait for a glossy, lump-free ganache. (I know, I know, but trust the process.)
Storing and reheating your childrens chocolate truffle
Fridge Storage Tips
Store your freshly rolled truffles in an airtight container lined with parchment paper to prevent sticking. I use glass containers with snap-on lids for easy stacking, and they keep beautifully for up to 5 days in the fridge.
The key is to let them cool completely before storing—this prevents condensation, which can make the chocolate turn white and grainy. 💛
For the best texture, bring truffles to room temperature for 10-15 minutes before serving. This softens them slightly while keeping that perfect snap. If you're short on time, pop them in the microwave for 5 seconds to speed up the process—just watch closely to avoid melting the chocolate!
Freezer Storage
Freezing extends shelf life to 3 months while maintaining that creamy texture. First, arrange truffles on a parchment-lined tray in a single layer, ensuring they don't touch. Freeze for 1 hour to set, then transfer to a ziplock freezer bag with all air squeezed out.
This prevents freezer burn and keeps them looking fresh. 🥶
When ready to serve, thaw truffles in the fridge overnight or at room temperature for 15-20 minutes. For a quick fix, microwave on low power for 10 seconds—just enough to soften without turning them mushy. The sprinkles will stay crisp if you add them fresh after thawing!
Reheating Tricks
If your truffles seem too firm after refrigeration, warm them gently in a microwave-safe bowl with a damp paper towel covering for 5-10 seconds at a time. This method preserves their shape and prevents melting.
For a stovetop approach, place truffles on a wire rack over simmering water for 1-2 minutes—the steam softens them evenly. ⚡
Avoid reheating in the oven, as direct heat can cause the chocolate to seize. Instead, rely on indirect methods like the microwave or steaming. If you're serving these at a party, keep them in a cooling rack over ice to maintain their firmness while guests enjoy them.
Packing for Parties
For events, pack truffles in small paper boxes or mini muffin liners to keep them intact. Store them in a cool cooler with ice packs to maintain freshness for up to 4 hours.
This is especially handy for birthday parties—kids love the individual servings, and parents appreciate the portion control! 🎉
Label your containers with the date and "Keep Refrigerated" to ensure they're enjoyed at their best. If you're shipping truffles, use insulated packaging with ice packs—this keeps them safe for travel while preserving their texture. The secret to success? Always return them to the fridge immediately after serving!
Nutrition facts
Frequently asked questions
Can my kids really taste the vegetables in these truffles?
Not at all! The carrot and sweet potato purees are blended completely smooth and make up such a small portion that the chocolate flavor dominates. The veggies actually enhance the natural sweetness, making these truffles taste even richer than traditional chocolate treats. Think of them as a sneaky nutrition boost that kids won't notice!
What if I don't have a microwave for melting the chocolate?
No problem! Use a double boiler method instead. Place the chocolate chips and butter in a heatproof bowl set over a pot of simmering water, stirring constantly until fully melted. Keep the heat on low to prevent overheating. This gentle method works perfectly and gives you more control over the temperature.
How can I make these truffles nut-free for school events?
Simply omit the optional nuts and stick to the chocolate chips and sprinkles. The recipe is already nut-free as written! For extra safety, check your chocolate chips and sprinkles for any cross-contamination warnings. You can also use dairy-free chocolate chips if needed—just ensure they're labeled as nut-free.
Why did my truffles turn grainy after refrigerating?
This usually happens when chocolate cools too quickly or gets exposed to moisture. To fix it, place the truffles in a microwave-safe bowl with a damp paper towel and heat for 5-10 seconds at a time, stirring between each interval. The steam helps restore that smooth texture. For prevention, make sure your mixing bowl is completely dry before chilling.
Can I make these truffles ahead of time for a birthday party?
These truffles actually taste better the next day as the flavors meld. Roll them 1-2 days ahead and store in an airtight container. For presentation, arrange them on a platter with colorful sprinkles or mini chocolate chips right before serving. Kids will love the fun colors and textures!