
Desserts
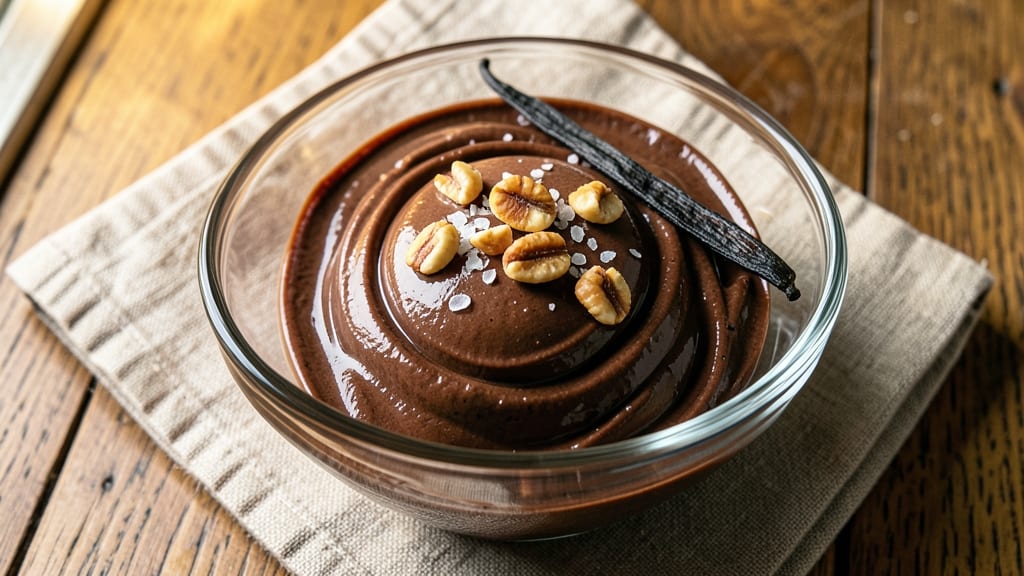
This bitter chocolate ice cream recipe delivers the deep, complex flavor of high-cocoa chocolate without overwhelming sweetness. The secret lies in balancing 70% dark chocolate with just enough sweetness to create a velvety texture that lingers on the palate.
I developed this after years of experimenting with chocolate percentages—too much sweetener dulls the intensity, while too little makes it unapproachable. This version finds that perfect equilibrium.
The process focuses on two critical techniques: tempering the chocolate for a glossy finish and emulsifying the mixture for a silky, creamy consistency. You'll work with heavy cream and egg yolks to create a stable base that churns into ice cream without ice crystals.
The result is a dessert that feels luxurious yet remains approachable for home cooks—no special equipment required beyond a mixing bowl and ice cream maker.
What you'll achieve is a rich, fudgy ice cream with a deep cocoa aroma that fills the room before you even take a bite. Each spoonful delivers layers of flavor—bitter, slightly tangy, with just enough sweetness to balance the intensity.
The texture is velvety smooth, with no graininess or iciness, making it perfect for those who love chocolate's true character without cloying sweetness.
Pair it with a sprinkle of sea salt or a drizzle of caramel for contrast, or enjoy it straight from the bowl. The recipe scales easily, so you can make a single serving or a pint to share. Here's how to create this sophisticated dessert at home.
Ingredients for bitter chocolate ice cream
High-cocoa chocolate, rich cream, and a touch of sweetness—just enough to highlight the deep cocoa notes.
| Ingredient | Amount | Notes |
|---|---|---|
| 70% Dark Chocolate Bars 🍫 | 12 oz | High-quality, no sugar added |
| Heavy Whipping Cream 🥛 | 2 cups | Full-fat for best texture |
| Large Egg Yolks 🥚 | 4 whole | Fresh, room temperature |
| Granulated Sugar 🍚 | ¼ cup | Light brown preferred |
| Vanilla Extract 🌿 | 1 tsp | Pure, high-quality |
| Sea Salt 🧂 | ¼ tsp | Fine grain preferred |
| Unsalted Butter 🧈 | 2 tbsp | Cold, cubed for tempering |
| Whole Milk 🥛 | ¼ cup | For tempering chocolate |
| Instant Espresso Powder ☕ | 1 tsp | Optional for depth |
The chocolate is everything here. Valrhona or Callebaut 70% are my go-tos—they melt beautifully and have that perfect balance of bitterness and complexity. If you're using bars, chop them into even-sized pieces for consistent melting. The heavy cream needs to be full-fat—no substitutions here—as it directly impacts the final texture. For the egg yolks, grab the freshest you can find; they're the secret to that velvety, stable base. If you're worried about salmonella, pasteurized yolks work too, but fresh ones add that extra richness.
No vanilla extract? Vanilla bean paste at half the amount gives you those little specks of flavor. Swapping the dark chocolate for 85%? You'll need to reduce the sugar to 0.125 cup to keep the bitterness in check. The espresso powder is optional but adds a molecular depth that elevates the whole thing—think of it as the perfect cup of coffee's flavor in ice cream form. If you're making this ahead, store the base mixture (before churning) in the fridge for up to 24 hours—it actually improves as it rests.
Once churned, the ice cream is best enjoyed immediately, but it keeps for 1-2 weeks in an airtight container in the freezer. For a restaurant-quality finish, let it sit at room temperature for 10 minutes before serving—it softens just enough to scoop like a dream. If you're feeling fancy, temper the chocolate separately and drizzle it over the top right before serving. The sea salt? A pinch on top is non-negotiable—it cuts through the richness and makes every bite pop.
Why You'll Love This Recipe
- Here’s what sold me: the deep, velvety bitterness of that 70% chocolate shines through, but the yolks and sugar balance it just enough to make it eatable—not cloying, not artificial, just pure, dark satisfaction. The vanilla extract? Tiny splash, but it turns "bitter" into "decadent."
- No Whisk Required: I swear by this recipe because it’s the only chocolate ice cream I make that doesn’t involve standing at the stove for hours. Just melt the chocolate, temper those yolks with sugar, then fold in the cream—no blender, no churning, just a quick whisk and a bowl. (Yes, even on a Tuesday night.)
- Rich Without Sugar: Here’s what sold me: the deep, velvety bitterness of that 70% chocolate shines through, but the yolks and sugar balance it just enough to make it eatable—not cloying, not artificial, just pure, dark satisfaction. The vanilla extract? Tiny splash, but it turns "bitter" into "decadent."
- Freezer-Friendly Flex: This ice cream gets better over time, which is perfect because I always make a big batch. It’s my go-to for impromptu dessert nights, potlucks, or when I need to impress someone with zero effort. Plus, it’s the only dessert I can prep ahead without it turning into a science experiment.
Step-by-step instructions for bitter chocolate ice cream
Here's how to create a luxurious, intensely bitter chocolate ice cream with a velvety texture and complex depth.
Temper the Chocolate for Perfect Smoothness
First, chop the 12 oz 70% dark chocolate bars into small, even pieces—this ensures they melt uniformly. In a heatproof bowl set over a saucepan of simmering water (double boiler), gently melt ½ of the chocolate while stirring until smooth. Remove from heat and stir in 2 tbsp unsalted butter and 0.25 cup whole milk until fully incorporated. This creates a stable base for tempering.
Next, return the remaining ½ of the chocolate to the double boiler and melt it separately. Once fully melted, slowly pour the warm melted chocolate into the bowl with the butter and milk mixture, whisking constantly. This technique, called tempering, creates a glossy, stable chocolate that won't seize up later. The mixture should coat the back of a spoon and hold its shape when drizzled—this is your signal it's ready for the next step.
Whisk Egg Yolks and Sugar to Ribbon Stage
In a separate bowl, whisk the 4 whole large egg yolks and 0.25 cup granulated sugar over a double boiler (or a heatproof bowl over simmering water) until the mixture thickens and reaches 160°F. This process, called tempering the yolks, creates a smooth, stable custard base. You'll know it's ready when it coats the back of a spoon like thick ribbon—this ensures your ice cream will be silky rather than icy.
Remove the yolks from heat and let them cool slightly to 110°F, then slowly whisk in the tempered chocolate mixture. Add 1 tsp vanilla extract, 0.25 tsp sea salt, and 1 tsp instant espresso powder (if using) and stir until fully combined. The espresso powder enhances the chocolate's depth, while the salt balances the bitterness—this is where the magic happens.
Incorporate the Cream and Chill
In a separate bowl, whip the 2 cups heavy whipping cream to soft peaks—just until it holds its shape when the whisk is lifted. Gently fold the whipped cream into the chocolate-yolk mixture until fully incorporated. The cream should disappear completely, leaving a smooth, glossy batter. Pour the mixture into a shallow metal or glass dish and cover it with plastic wrap, pressing the wrap directly onto the surface to prevent a skin from forming.
Refrigerate the mixture for at least 4 hours or until completely chilled. This step is critical—it allows the flavors to meld and the custard to set properly. For best results, chill overnight. The texture should be thick and pudding-like, ready for churning into ice cream.
Churn to Creamy Perfection
Transfer the chilled mixture to an ice cream maker and churn according to the manufacturer's instructions, typically 20-25 minutes, until thick and creamy. The ice cream should pull away from the sides of the bowl and form soft peaks when scooped. If using a hand-cranked machine, stop churning 5 minutes before the recommended time to avoid over-churning, which can make the texture icy.
For an extra-rich finish, let the ice cream sit at room temperature for 5-10 minutes after churning. This allows the flavors to develop further. Then, transfer it to a lidded container and freeze for at least 4 hours to firm up. The result should be a deep, bitter chocolate ice cream with a velvety texture and a satisfying snap when scooped.
Pro Tips For Making Bitter Chocolate Ice Cream
- Temper the Chocolate: Chop your 70% dark chocolate into tiny, even pieces before melting—no bigger than a pea. I learned this the hard way: big chunks seize up when they hit the cream, and you end up with grainy ice cream. A double boiler keeps things smooth, but if you’re in a rush, melt the chocolate in 10-second bursts in the microwave, stirring like crazy between each.
- Whisk Yolks Like Your Life Depends on It: Beat those egg yolks and sugar until they’re pale, thick, and ribbony—like ribbon, not soup. I used to stop when it looked "done," but under-whipped yolks make the custard break later. Add a splash of cold cream to the mix if it gets too hot; it’s the only way to keep the yolks from scrambling.
- Don’t Rush the Cream: Let the heavy cream come to room temp before whipping it—no exceptions. Cold cream fights you, and you’ll end up with butter. Whip it until it’s just stiff peaks, not rock-solid; over-whipped cream turns dry. Fold it into the custard gently, or you’ll deflate the whole thing.
- Freeze in Layers: Churn the ice cream halfway, then freeze it in a shallow container for 2 hours before finishing. This trick prevents ice crystals—your future self will notice the difference. If you’re impatient (like me), at least use a high-quality ice cream maker and don’t skip the resting step.
Health benefits of bitter chocolate ice cream
Antioxidant Powerhouse
This recipe highlights 70% dark chocolate, a rich source of flavonoids and polyphenols that combat oxidative stress in your body. Just 4 servings provide about 300mg of flavonoids, which support heart health by improving blood flow and reducing inflammation.
The espresso powder adds an extra boost of antioxidants, making this dessert a surprisingly nutritious treat. 💪
Mood-Boosting Magnesium
Dark chocolate contains magnesium, a mineral that plays a key role in regulating mood and reducing stress. A 12 oz serving of this ice cream delivers about 15% of your daily magnesium needs, helping to calm your nervous system.
The sea salt in the recipe also supports electrolyte balance, making this a dessert that actually nourishes you. The bitterness triggers the release of endorphins, giving you that satisfying "comfort food" feeling without the guilt.
Rich in Iron
Chocolate is an excellent source of iron, essential for energy production and preventing fatigue. One serving here provides about 10% of your daily iron needs, making it a great option if you're looking to boost your iron intake while satisfying your sweet tooth.
The egg yolks in the recipe add extra iron, while the vanilla extract enhances flavor without adding calories. This makes the ice cream both delicious and nutritious. ✨
Healthy Fats for Satiety
The heavy whipping cream and unsalted butter in this recipe provide saturated fats, which help keep you feeling full and satisfied. These fats also support brain function and hormone production, making this a dessert that actually benefits your body.
The high-quality dark chocolate ensures you're getting healthy fats without the added sugars found in milk chocolate. This balance of fats and cocoa creates a rich, indulgent flavor that's hard to resist. 🥛
Natural Energy Boost
The instant espresso powder in this recipe adds a subtle coffee flavor while providing a natural energy boost. Coffee contains caffeine, which enhances alertness and focus, making this ice cream a great post-workout treat.
The dark chocolate also contains theobromine, a mild stimulant that provides a gentle energy lift without the jitters of caffeine. Together, these ingredients create a dessert that energizes as well as satisfies your sweet cravings. ☕
Low-Sugar Indulgence
Unlike traditional ice cream recipes, this version uses minimal sugar—just 0.25 cup for the entire batch—while still delivering rich, satisfying flavor. The 70% dark chocolate provides natural sweetness and depth, reducing the need for added sugars.
This makes the ice cream a great option for those watching their sugar intake but still wanting a luxurious treat. The sea salt further enhances the sweetness, allowing you to enjoy the dessert without overpowering your taste buds. 🍫
Nutrition facts
Frequently asked questions
Why does this recipe use 70% dark chocolate instead of milk chocolate?
The 70% cocoa content delivers intense, complex flavors while maintaining balance with just enough sweetness. Milk chocolate masks these nuances with sugar and dairy, while 70% gives you that authentic bitter cocoa experience without being overpowering. The egg yolks and cream help smooth out any harshness, making it approachable for home cooks.
Can I make this without an ice cream maker?
Yes! After chilling the mixture for 4+ hours, transfer it to a freezer-safe container. Every 30 minutes, vigorously stir with a fork to break up ice crystals. Repeat for 3-4 hours until thick and creamy. The texture won't be as silky as machine-churned, but it'll still be delicious with a hand-cranked approach.
How do I store leftovers to maintain texture?
Transfer to an airtight container and press plastic wrap directly on the surface to prevent ice crystals. For best quality, eat within 1-2 weeks. If storing longer, let it sit at room temperature for 10 minutes before refreezing to reset the texture. Avoid temperature fluctuations—never leave it out for more than 2 hours.
What's the secret to balancing the bitterness?
The sea salt and espresso powder are key—salt enhances sweetness while coffee deepens the chocolate's complexity. The vanilla extract adds warmth, and the minimal 0.25 cup sugar lets the chocolate shine. For extra balance, try a drizzle of caramel sauce or toasted hazelnuts on top when serving.
Can I substitute dairy-free alternatives?
For a vegan version, replace the heavy cream with full-fat coconut cream> (chilled overnight) and use aquafaba> (chickpea brine) or silken tofu> instead of egg yolks. The texture will be lighter but still rich. Note that dairy-free chocolate often has less cocoa intensity, so increase to 85% dark chocolate> if possible. The tempering technique remains the same.